This page is part of archived documentation for openHAB 3.4. Go to the current stable version
# Timers & Delays
Timers and Delays are a little more complex but add important functionality to rules. Whilst the "Wait-For"-block is straightforward, the timer blocks should be well understood before being used - they may behave differently than expected. This chapter explains what these blocks do, sometimes displaying generated code to explain what is happening behind the scenes.
More about that topic can be viewed at Timers (opens new window).
# Overview of the Timers and Delays category
# Timer Naming
Timers are created and referred to by name, enabling manipulation within a rule.
Important: a named timer is only available within the same rule. The same timer cannot be accessed via a different rule. A different rule with a timer of the same name results into two separate timers.
# Wait for
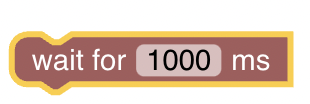
Function: Suspends execution of the rule for a given period of time
- unit of time (ms) is milliseconds (1000 ms = 1 second)
Example
The following simple example uses a loop to implement a blinking light with a 1 second delay, looping three times:
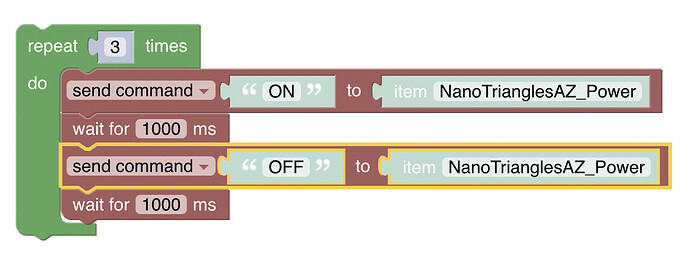
More about that topic can be viewed at Waiting in Rules (opens new window)
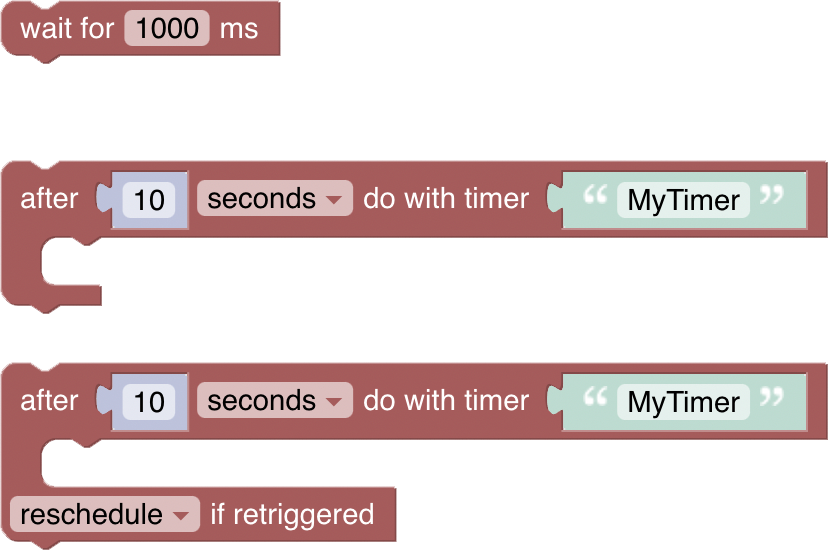
# After period of time Do With Timer
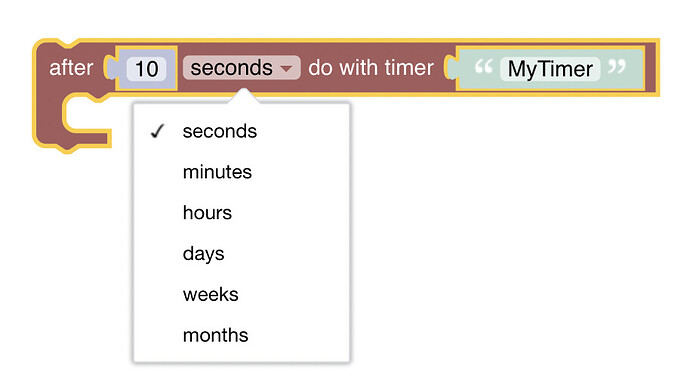
Function: Schedule a task to be performed once after a specific amount of time has elapsed.
- A number and unit (seconds, minutes up to months) can be chosen after which the commands within the block will be executed
- Provide the name of the timer, allowing further access to that timer within the same rule. The name also ensures the timer is unique within the rule.
Example
10 seconds after the rule has been called, the timer triggers all lights to go off:

# Reschedule Timer
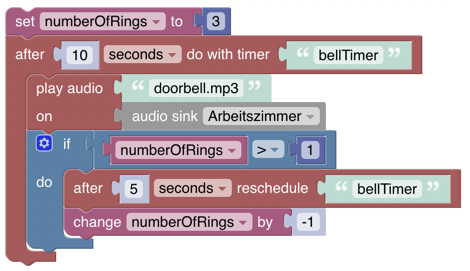
Function: Sometimes one may want to use the same timer and reschedule the same block of code again. This can be achieved with the reschedule-block
An example is as follows:
- The code within the timer-block will run after 5 seconds.
- The last part in the block reschedules the same timer-block for 5 seconds later.
- And so on, in an endless loop.

Setting up an endless timer in the above way is not recommended. The example shown below will stop rescheduling after 3 doorbell rings.
# After period of time Do With Timer with options on retriggering rule
Function: Schedule a task to be performed at a specified period in the future with the ability to reschedule, cancel or ignore the timer when the rule is retriggered.
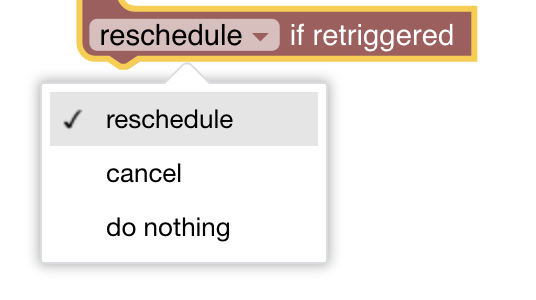
Before using that block, it is important to understand what the idea behind the option of retriggering: Though it may not seem to be obvious, the same rule can be retriggered at any time. To allow more control about what is happening in this case the rule is executed again, the following options are available:
Options on Retrigger
- reschedule: If the same rule that contains this Blockly script is re-triggered, and this specific timer is currently active, this specific timer will be rescheduled (i.e. restart the countdown timer).
- cancel: If the same rule that contains this Blockly script is re-triggered, and this specific timer is currently active, this specific timer will be cancelled. The code within the timer will not be executed.
- do nothing: If the same rule that contains this Blockly script is re-triggered, nothing happens - this will make the block identical to the simple timer-block in function, but the generated code is slightly modified - see below.
Generated code
The following code example and the following are provided to understand what exactly happens behind the scenes:
if (typeof this.timers['MyTimer'] === 'undefined' || this.timers['MyTimer'].hasTerminated()) {
  this.timers['MyTimer'] = scriptExecution.createTimer(zdt.now().plusSeconds(10), function () {
    })
} else {
  this.timers['MyTimer'].reschedule(zdt.now().plusSeconds(10));
}
Simple timer-block
The simple timer-block generates the code shown underneath the image below.
if (typeof this.timers['simpleTimerBlock'] === 'undefined' || this.timers['simpleTimerBlock'].hasTerminated()) {
  this.timers['simpleTimerBlock'] = scriptExecution.createTimer(zdt.now().plusSeconds(10), function () {
    })
}
Retrigger timer-block
The retrigger timer-block inserts an additional else{} branch into the generated code which will run if:
- The rule is retriggered and
- the timer already exists and
- the timer has not yet finished (it's still ticking)
In the case of do nothing the else{} branch is empty (which turns to be almost equals to the simle-timer).
if (typeof this.timers['nothingTimerBlock'] === 'undefined' || this.timers['nothingTimerBlock'].hasTerminated()) {
  this.timers['nothingTimerBlock'] = scriptExecution.createTimer(zdt.now().plusSeconds(10), function () {
    })
} else {
  // do nothing
}
In the case of cancel the else{} branch contains code to cancel the timer.
if (typeof this.timers['cancelTimerBlock'] === 'undefined' || this.timers['cancelTimerBlock'].hasTerminated()) {
  this.timers['cancelTimerBlock'] = scriptExecution.createTimer(zdt.now().plusSeconds(10), function () {
    })
} else {
  this.timers['cancelTimerBlock'].cancel();
  this.timers['cancelTimerBlock'] = undefined;
}
In the case of reschedule the else{} statement contains code to reschedule the timer - restart the countdown. In the example generated code below:
- Imagine the rule is triggered at 0 elapsed seconds.
- The timer is started with a 10 second countdown.
- Lets say the rule is triggered again at 5 elapsed seconds.
- Then timer will be rescheduled for another 10 second countdown, so will execute the code within its block at 15 elapsed seconds.
if (typeof this.timers['rescheduleTimerBlock'] === 'undefined' || this.timers['rescheduleTimerBlock'].hasTerminated()) {
  this.timers['rescheduleTimerBlock'] = scriptExecution.createTimer(zdt.now().plusSeconds(10), function () {
    logger.info('I am doing my job');
    })
} else {
  this.timers['rescheduleTimerBlock'].reschedule(zdt.now().plusSeconds(10));
}
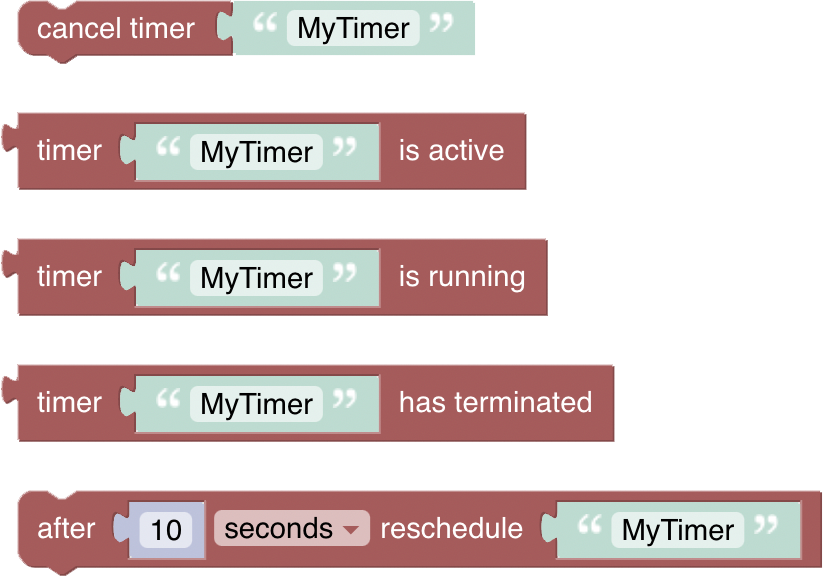
# Cancel Timer
Function: Cancels the existing named timer, preventing code within the timer block from executing.
# Timer is Active
Function: returns true if the timer itself is currently counting down, and the code within the timer will be eventually executed as scheduled. This block will return false if the timer doesn't exist, has been cancelled, or has already finished.
# Timer is Running
Function: returns true if the code within the timer block is currently running - i.e. the countdown has finished, and the code within the timer block is currently executing. This event will usually only last a few milliseconds, and you’d be (un)lucky to catch it when your rule retriggers.
# Timer has terminated
Function: returns
true if the timer has finished its countdown, and the code within the timer block has finished running.
# Comprehensive Timer Example
The intent here is to trigger an alarm to the police but allow the timer to be reset in case a reset button has been pressed during the trigger time. The rule is triggered when the burglar-alarm-item or the reset-button-item is changed.


